What Are The 7 Steps For Giving A Safe Injection?
What is a safe injection?
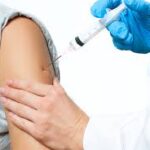
As defined by the World Health Organization, a safe injection is one that does not harm the recipient, does not expose the provider to any avoidable risks, and does not result in waste that is dangerous for the community.
Injected medicines are commonly used in healthcare settings for the prevention, diagnosis, and treatment of various illnesses. Unsafe injection practices put patients and healthcare providers at risk of infectious and non-infectious adverse events and have been associated with a wide variety of procedures and settings.
This harm is preventable. Safe injection practices are part of Standard Precautions and are aimed at maintaining basic levels of patient safety and provider protection.
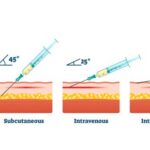
The four most frequently used types of injection are:
- Intravenous Injection: The abbreviation of intravenous injection is IV. This route is the fastest way to send medication and deliver fluids directly into a vein. Intravenous (IV) injection or infusion; medication sent directly into the vein using a needle or tube.
- Intramuscular Injection: The abbreviation of intramuscular injection is IM. This route is used for the Injection of a substance into muscle.
- Subcutaneous Injection: The abbreviation for subcutaneous injection is SC. For SC injection, the short needle is used to give medication into the layer between the skin and muscle.
- Intradermal Injection: The abbreviation of Intradermal injection is ID. This route is used to deliver medication into the dermis or the skin layer underneath the epidermis.
The 7 Steps For Giving A Safe Injection
The seven steps outlined in this article for giving a safe injection are as promoted by the Health Department Of Washinton University. They are:
Step 1: A clean workspace
To ensure that injection equipment is not contaminated, it is important to keep the medication preparation area clean. This means removing clutter from all surfaces so that they may be adequately disinfected prior to gathering the necessary injection equipment. This image is an example of a clean workspace. Always:
- Check the patient’s file or prescription to confirm the identity of the patient and the correct dose to be injected.
- Prepare each injection in a clean, hygienic area where there is a low risk of blood and body fluid contamination, or of any splashing.
- Clean your hands with an alcohol-based hand rub or soap and water before preparing medication and touching the patient. Follow WHO’s “5 Moments for Hand Hygiene”.
- Disinfect the patient’s skin before an injection, using a 60-70% alcohol-soaked swab.
- Collect the used syringe and needle immediately after the injection, and dispose them of without any additional manipulation into the sharps container.
- Manage health care and sharps waste appropriately and safely.
Step 2: Hand hygiene
Be sure to practice proper hand hygiene before preparing and giving an injection (moment 2), and after the injection has been administered (moment 3). When hand hygiene is performed at the right moment, it keeps the patient, other HCWs, and yourself safe.
Gloves and Injections
For routine intradermal, subcutaneous, or intramuscular injections, gloves are not required if both your skin and the patients are intact. Examples of skin that is not intact are eczema, burns, cuts, scabs, and skin infections. Always wear gloves during vascular access injections; the possibility of blood exposure at the puncture site is high.
Do not use or wash the same pair of gloves for multiple patients. If gloves are used for injection, hand hygiene is performed before and after glove use. Glove use is not a substitute for hand hygiene.
Step 3: Sterile, safety-engineered syringe
To reduce and avoid the risk of disease transmission, always use sterile injection equipment. For all injections, WHO recommends safety-engineered injection devices, often called RUP. RUP syringes with a sharps injury-protection feature are highly recommended, and preferable wherever possible.
Be sure that the syringe package is intact, and check that there is no moisture inside. Only syringes and needles from new packets should be used. If you do see that the package has been ripped, torn, or otherwise compromised, safely discard it and use a new one. This image is an example of compromised packaging.
Step 4: Sterile medication vial and diluent
After checking that your injection equipment is sterile, it is important to know how to handle vials and ampoules without causing contamination. To prevent contamination and spread of infections, use each vial one time for one patient. The preservatives used in multidose vials do not eliminate microbial contamination, so the use of multidose vials has been associated with many outbreaks. As a review of 60 reports in 2011 noted, “there is good evidence that contamination of multidose or single-dose vials can contribute to infection.”
When preparing a medication vial, wipe the rubber septum (or stopper) with a cotton swab or ball soaked with 60-70% alcohol. Do not touch, fan, or wipe off the disinfectant; allow the septum to air dry. Pierce the septum of the vial with a new and sterile syringe and needle. Insert air into the vial before drawing up the medication. As mentioned earlier, do not leave a needle in the septum of a vial as this can lead to contamination.
Medication in the form of powder must be reconstituted. Reconstitution is the process of adding a liquid to a dry ingredient before administering it. The following aseptic technique must be followed when reconstituting medication.
- Always use a sterile syringe and needle to withdraw the reconstitution solution (liquid) from an ampoule or vial.
- Once the solution is withdrawn, inject the necessary amount of fluid into the single or multidose vial by inserting the needle into the rubber septum.
- Mix the contents of the vial thoroughly until all visible particles have dissolved.
The use of multidose vials should be avoided; if they are used, they should never be used for multiple patients, but only for the same patient. Following the injection, it is important to properly label and safely store the medication. For reconstituted medication in a multidose vial, use the following label details:
- Date and time of preparation
- Expiry date and time
- Type and volume of reconstitution liquid (if applicable)
- Name and signature of the person reconstituting the medication
Step 5: Disinfecting skin
Prior to giving an injection, it is necessary to properly prepare the patient’s skin. Different types of injections require different methods of skin preparation. If the patient’s skin integrity is compromised due to infection or any other skin condition, avoid giving the injection.
The skin should be prepared in different ways depending on the type of injection. For routine intradermal, subcutaneous, or intramuscular injections, disinfection with alcohol or another disinfectant is not required.
| Injection Type | Method |
| Intradermal and subcutaneous injections | Soap and water |
| Intramuscular injections (therapeutic) | Soap and water, (or 60—70% alcohol*) |
| Intramuscular injections (immunization) | Soap and water |
| Venous access | 60-70% alcohol |
*Unresolved issue; there is a lack of evidence on the need to disinfect the skin before intramuscular injections.
To disinfect with an alcohol-based solution:
- Wipe the area with a cotton ball or swab soaked with 60—70% alcohol-based solution. Work from the center of the area outwards. Avoid wiping the same area with the same swab.
- Wait 30 seconds for the area to air dry.
Presoaked cotton balls that have been stored in containers should not be used for disinfection. This could cause contamination.
Methanol (or methyl alcohol) is not suitable for use in humans and should not be used as a skin disinfectant.
Step 6: Appropriate sharps disposal
After an injection has been given, it is time to safely and correctly dispose of the needle and syringe. Appropriate sharps disposal prevents needle-stick injuries and the spread of infections. To ensure proper disposal after every injection:
- Immediately place syringes and un-capped needles into a sharps container.
- Never recap a needle.
- Do not bend, break, manipulate, or manually remove the needle or syringe.
- A sharps container must be within arm’s reach of where sharps are used (at the point of care).
Follow these steps if for any reason the medicine has been drawn into the syringe, but the injection must be delayed:
- Re-cap the needle using the one-handed ‘scoop’ technique. Do not use your other hand to re-cap the needle; it is safer to place the needle cap on a flat surface and scoop the needle inside the needle cap. This protects your other hand from an accidental needle-stick injury. Once the needle is inside, you may use your other hand to secure the cap in place. This image depicts this technique.
- Label and store the syringe according to the manufacturer’s recommendations.
- If the needle comes into contact with a non-sterile surface, immediately discard the syringe.
Step 7: Appropriate waste management
Managing sharps waste is important not only for the safety of your facility and patients but also for the community. Exposure to needles that have not been safely disposed of can lead to the risk of injury and the potential spread of disease. For example, contaminated needles are sometimes dumped in public waste sites; children can find these sharps in the open and play with them as toys.
Sharps containers are puncture-resistant containers that safely store used sharps, as seen in this photograph. When a sharps container is about three-quarters filled, it must be sealed and stored in a secure place before final disposal. Opening a sharps container prior to its final disposal can lead to potential needle-stick injury and/or infection.
In cases when proper sharps containers are difficult to procure, you may provide low-cost alternatives. Improvised sharps containers may be made from throw-away items, such as metal containers, plastic bottles, or durable cardboard boxes. Label your improvised sharps container as “sharps waste”. Once it is full, make sure you can completely close and tightly seal this container to prevent it from being opened before final disposal.

