a hormone primarily
with male sexual development and reproductive function, although it is also present in females, albeit at lower levels. It plays a crucial role in the development of male secondary sexual characteristics, such as facial and body hair growth, deepening of the voice, muscle mass and strength development, and the production of sperm.
In addition to its effects on sexual development, testosterone also influences other bodily functions. It contributes to bone density, red blood cell production, mood regulation, cognitive function, and overall well-being. Testosterone levels tend to be highest during adolescence and early adulthood and gradually decline with age.
Low testosterone levels, also known as hypogonadism, can lead to various symptoms, including reduced libido, erectile dysfunction, fatigue, decreased muscle mass, increased body fat, depression, and decreased bone density. In such cases, hormone replacement therapy (HRT) may be prescribed under medical supervision.
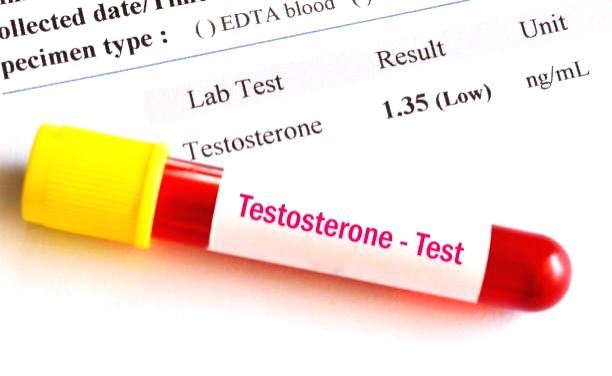
In adult males, normal testosterone levels typically range between 300 to 1,000 nanograms per deciliter (ng/dL). However, the exact range may vary slightly depending on the laboratory and specific reference values used. Testosterone levels tend to be highest during adolescence and early adulthood. As men age, testosterone levels gradually decline, typically around 1-2% per year after the age of 30 or 40.
It’s worth noting that testosterone levels can be influenced by factors such as age, genetics, overall health, lifestyle, and underlying medical conditions. In this article, we will take a close look at the relationship btween flaxseed and testosterone levels.
What is flaxseed?
Flaxseed, also known as linseed, is the seed of the flax plant (Linum usitatissimum). It is a small, brown or golden seed that is often consumed in ground or milled form, as the outer shell is difficult to digest. Flaxseed is a popular ingredient in many health-conscious diets due to its potential health benefits.
Flaxseed is rich in various nutrients and bioactive compounds. Here is a breakdown of its nutritional value per 100 grams of flaxseed:
• Calories: 534
• Carbohydrates: 28.9 grams
• Dietary fiber: 27.3 grams
• Sugars: 1.5 grams
• Fat: 42.2 grams
• Saturated fat: 3.7 grams
• Monounsaturated fat: 7.5 grams
• Polyunsaturated fat: 28.7 grams
• Protein: 18.3 grams
Flaxseed is particularly known for its high content of the following nutrients and bioactive compounds:
1. Omega-3 fatty acids: Flaxseed is one of the richest plant sources of alpha-linolenic acid (ALA), an essential omega-3 fatty acid. Omega-3 fatty acids are known for their anti-inflammatory properties and potential benefits for heart health.
2. Dietary fiber: Flaxseed is a good source of both soluble and insoluble fiber. The high fiber content can contribute to digestive health, help regulate blood sugar levels, and promote a feeling of fullness.
3. Lignans: Flaxseed contains lignans, which are phytoestrogens with antioxidant properties. Lignans have been studied for their potential protective effects against certain types of cancer, cardiovascular disease, and menopausal symptoms.
4. Protein: Flaxseed is a plant-based source of protein, providing essential amino acids necessary for various bodily functions, including muscle growth and repair.
It’s important to note that while flaxseed offers various health benefits, it is also relatively high in calories and fat. Flaxseed can be incorporated into your diet by adding it to smoothies, cereals, yogurt, baked goods, or using it as an egg substitute in certain recipes. However, it is best to consume ground flaxseed as the whole seeds may pass through the digestive system undigested, limiting the absorption of its nutrients.
Does Flaxseed Lower Testosterone?
Yes, there is some evidence suggesting that flaxseed may have a slight effect on testosterone levels, but more research is needed to draw definitive conclusions. Flaxseed contains compounds called lignans, which are a type of phytoestrogen. Phytoestrogens are plant-derived compounds that can have estrogen-like effects in the body.
Some studies have suggested that the lignans in flaxseed may have anti-androgenic effects, meaning they could potentially lower testosterone levels. In a small study involving 25 men with prostate cancer, it was observed that supplementing with flaxseed and reducing overall fat intake led to a significant decrease in testosterone levels. Additionally, a case study documented the daily consumption of flaxseed supplements and its effect on reducing testosterone levels in a 31-year-old woman with polycystic ovary syndrome, a condition associated with elevated male hormones.
However, it is important to note that the potential effects of flaxseed on testosterone levels in both men and women are likely to be mild, and other factors such as overall diet, lifestyle, and individual variation may have a greater impact on hormone levels which defeats the flaxseed testosterone myth.
If you have concerns about your testosterone levels or are considering using flaxseed for specific health purposes, it is best to consult with a healthcare professional who can provide personalized advice based on your individual circumstances.
Medicinal plants That Lower Testosterone Levels In Females and Males
While some medicinal plants may have the potential to influence hormone levels, including testosterone, it’s important to note that altering hormone levels should be approached with caution and under the guidance of a healthcare professional. Here are a few examples of medicinal plants that have been traditionally used and studied for their potential effects on testosterone levels:
1. Spearmint: Spearmint tea or extract has been suggested to have anti-androgenic effects and may potentially lower testosterone levels in females with conditions like hirsutism (excessive hair growth) or polycystic ovary syndrome (PCOS). However, more research is needed to establish its efficacy and safety.
2. Saw Palmetto: Saw palmetto is often used for prostate health in males, and it has been suggested to potentially inhibit the conversion of testosterone to dihydrotestosterone (DHT). However, the evidence is mixed, and more research is needed to determine its effectiveness.
3. Licorice: Licorice root contains compounds that may have anti-androgenic effects and potentially lower testosterone levels. However, prolonged and excessive use of licorice can lead to side effects and should be used cautiously.
4. Chaste tree (Vitex agnus-castus): Chaste tree is commonly used to balance hormone levels in females, especially for conditions related to the menstrual cycle. It may indirectly affect testosterone levels by influencing other hormone pathways. It’s important to note that chaste tree is not recommended for use in males seeking to lower testosterone levels.
It’s crucial to emphasize that the effects of these medicinal plants on testosterone levels may vary and their efficacy and safety are not yet fully established. Moreover, individual responses to these plants can differ, and they may interact with medications or have other contraindications.
If you are considering using medicinal plants to modify hormone levels, it is essential to consult with a healthcare professional, such as a naturopathic doctor or an integrative medicine practitioner, who can provide guidance tailored to your specific needs and monitor your health during the process.

One Comment